


Phase 3: Digital Assets
Upload your product images and media, then map them to your products so every catalogue item carries the right visuals — a step that's required before a product can be approved.
1. What Are Digital Assets?
Digital assets are the images and media files that bring your catalogue to life — product photography, packaging shots, and visuals tied to a specific product. Once you've added products in Phase 2, this is where you give each one its imagery.
Watch: Digital assets walkthrough
Prefer to watch? This short guide covers uploading, mapping and coverage.
2. Uploading Assets
From your dashboard, click Upload Digital Assets. You can upload assets two ways:
- Individual images — upload product images one at a time.
- ZIP bundle — package multiple images into a single ZIP and upload them in one go for faster bulk loading.
Newly uploaded files appear on your My Uploads page, where they're processed and wait to be mapped to a product. An uploaded asset isn't attached to anything yet — mapping is the next step.
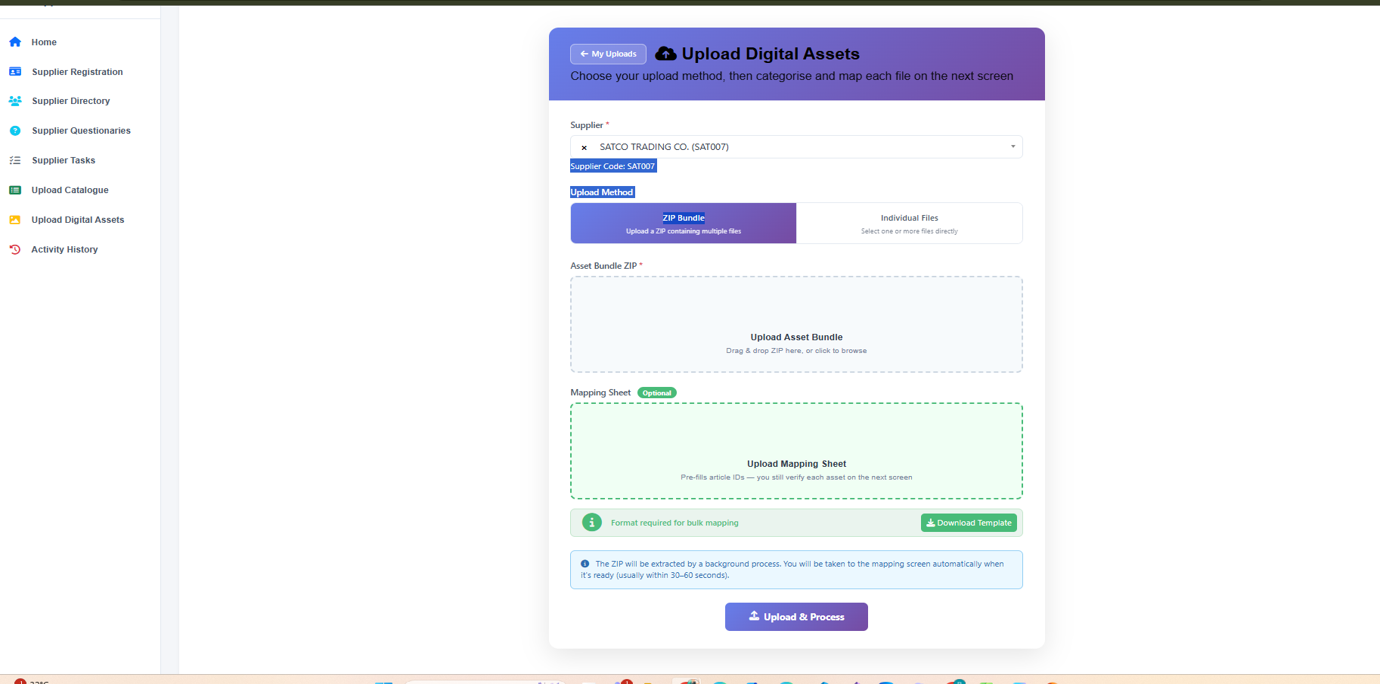
Fig 1: Uploading images or a ZIP bundle
3. The My Uploads Page
Everything you upload lands on the My Uploads page — this is where you finish the job. Two things happen here: you confirm each file has been processed, and you map any assets that aren't yet linked to a product.
Checking processing status. After an upload — especially a large ZIP bundle — the system needs a moment to process the files. My Uploads shows whether each asset has finished processing or is still in progress. An asset is only ready to map once it has been processed.
Mapping unmapped assets. Processed assets that aren't yet linked to a product show as unmapped. To map one:
- Open an unmapped asset on the My Uploads page.
- Select the product it belongs to.
- Confirm — the asset is now attached to that product.
Processing
Uploaded and still being processed by the system — not ready to map yet.
Unmapped
Processed and ready, but not yet linked to a product. Map it on My Uploads.
Mapped
Linked to a product — this is what's needed before the product can be approved.
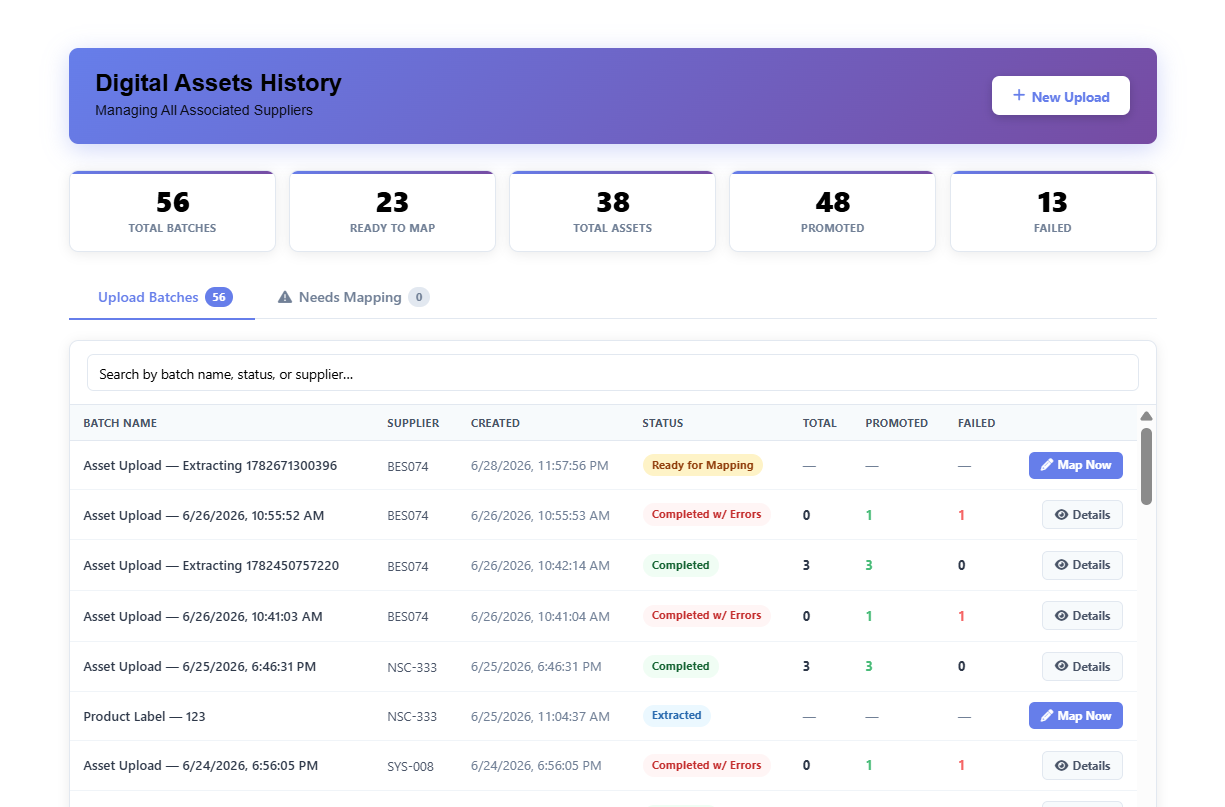
Fig 2: The My Uploads page — check processing status and map unmapped assets
4. Tracking Asset Coverage
Your dashboard summarises how complete your imagery is so you can spot gaps at a glance:
- Asset coverage — the share of your products that have a mapped asset.
- Mapped / unmapped — how many of your assets are linked to a product versus still unmapped.
- Total assets — everything you've uploaded, mapped and unmapped.
Use these figures to drive your remaining work: any product without an asset, and any asset left unmapped, is a quick win toward full coverage.